 |
How to Add Gadget/Widget Inside your Blogger Header? |
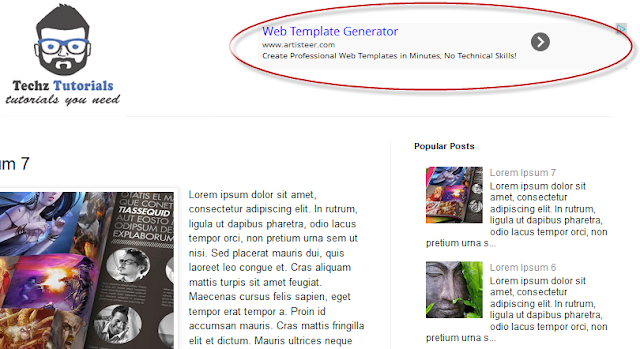
May be you have seen blogger blogs which have widget area in blogger header. You can add widgets in blogger header. Many of the blogger use Adsense ads in blogger header to increase impressions.

Some Blogger Templates have gadget/widget area by default. If you are using blogger templates which doesn't have gadget/widget area inside blogger header then you can follow this tutorial to learn How to Add Gadget/Widget Inside your Blogger Header?.
Important Note: You must create a backup of your template before following this method.
How to Add Gadget/Widget Inside your Blogger Header?
Resize Blogger Header:
If your template has not widget/gadget area in blogger header then maybe your template header width will be full size. before adding widget/gadget inside your blog header you have to resize you blog header te create a space for widget.
How to Resize Blogger Header?
1. Login Blogger Account.
2. Go to Template > Edit HTML.
3. Search for the following code.
<b:section class='header' id='header' maxwidgets=
Important Note: If you are unable to find this code then make sure that there is no space before or after the code.
4. After finding the code, replace class='header' with class='header-left' .
5. Now you have to find the following code.
<div class='header-cap-bottom cap-bottom'>
You will see two </div> tags before the searched code.
Important Note: If you are using custom template downloaded from 3rd Party then maybe you will not find these codes. In this case, you have to leave the 4th and 5th steps and add the codes of 6th and 7th steps right after the </b:section> tag.
6. Paste the following code just above the two </div> tags.
<div style='clear:both;'/>
How to Add Gadget/Widget Inside your Blogger Header?
7. Add the following code above <div style='clear:both;'/> (6th Step)
<b:section class='header-right crosscol' id='header-right' maxwidgets='1' showaddelement='yes'/>
8. Find the following tag.
</head>
9. Above the </head> tag add the following code.
<style>
.header-left{
display: inline-block;
float: left;
}
#header-right {
display:inline-block;
float:right;
}
</style>
Important Note: If you widget is wider than your overall area that both widgets will occupy then you have to add margin-right property to move it on the right. See the code example below.
<style>
.header-left{
display: inline-block;
float: left;
}
#header-right {
display:inline-block;
float:right;
margin-right: -20px; }
</style>
10. Save Template.
11. Go to Layout and you will see two Widgets/Gadgets area in your blogger header area.
Don't worry about the position of new widget area in layout. This is because of the different template. Just make sure that you drag the newly created widget just below the "Header" section.
You can add search box, social follow buttons, social sharing buttons, adsense ads and more in your new widget/gadget area.

