 |
How to Get Windows 10 Style Start Menu in Windows 8.1? |
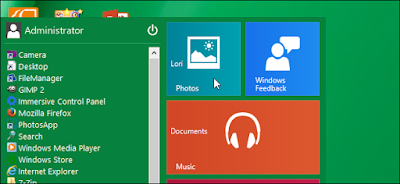
If you are using Windows 8.1 then you can add Windows 10 Style Start Menu in Windows 8.1. Why not upgrade to Windows 10. If your computer/laptop doesn't fulfill requirements to install Windows 10 then you can use this method to add a feature of Windows 10 in Windows 8.1.
Important Note: Some of the antivirus programs detects that this an adware/ads. But don't worry this is tested program and there is no ad or any virus.
How to Get Windows 10 Style Start Menu in Windows 8.1?
1. Download ViStart and Run the program.
The file that you will download from the above link is used to run the program. When you will run the ViStart it will create "ViStart Directory" in "App Data Folder" which will give access to software to install skins.
2. When you will run the program, Right Click on ViStart icon in taskbar system tray and the select Exit to close the program.
Important Note: You may see that when you will exit ViStart, the Start orb on the Taskbar disappeared. This seems to be a minor bug. You can still access the Start screen by pressing the Windows key. You can get the Start orb back by logging out and back in or by restarting your computer.
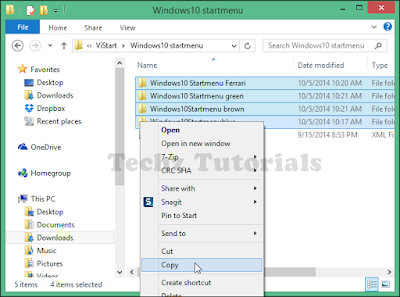
3. Download Windows 10 Start Menu Skin Pack You like. Extract the Skin if they are in ZIP, RAR Format.
4. Hit Windows Key + R to open Run. Type the following line in the dialog box and click ok.
%apdata%\ViStart\_skins
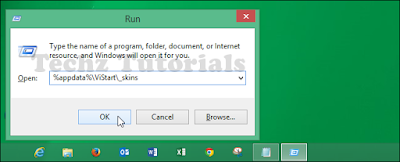
5. Copy and paste the extracted skins in the _skins directory.
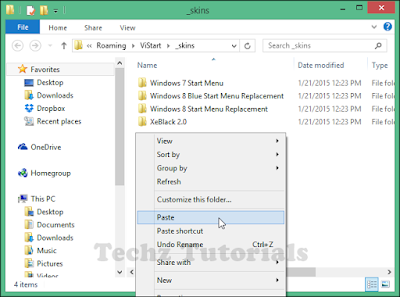
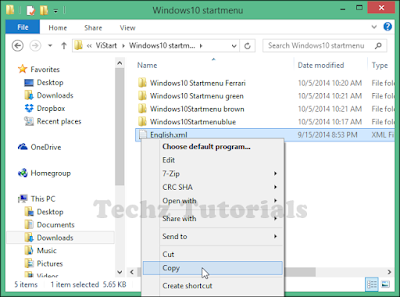
6. Now go to the folder from where you copied the skins. There you will find file English.xml. Copy the file.
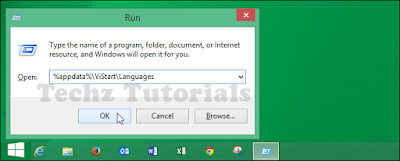
7. Hit Windows Key + R to open Run. Type the following line in the dialog box and click ok.
%apdata%\ViStart\Languages
I recommend you to change to name of original file already in the directory English.xml file before copying the file into new directory.
Important Note: You can rename file by pressing F2 Key.
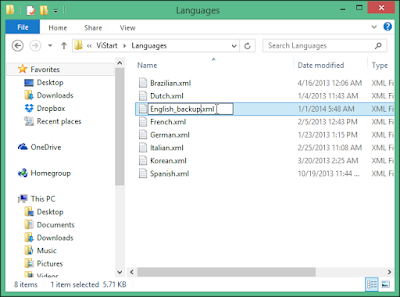
8. After renaming the original file paste the file you cpoied before.
10. To make the start menu like Windows 10. Right Click on icon of ViStart in System Tray and Select Options.
Now you can see the options.
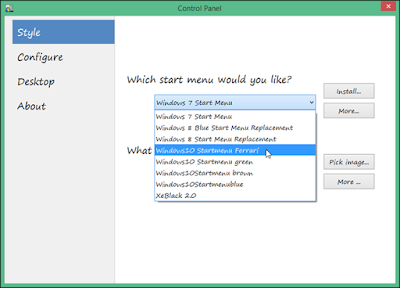
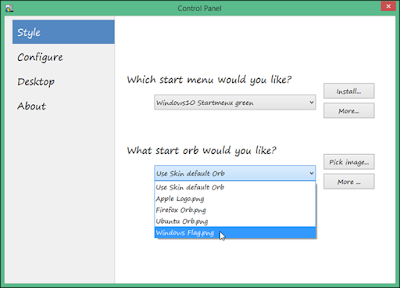
You can also select the style of Start orb.
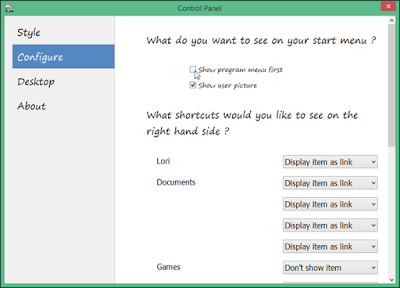
11. Click on Configure to select the options which you want to display in start menu.
12. The desktop screen allows you to configure how start button and windows key behaves. You can also select the option show or hide ViStart Icon in System Tray. You can also use some features of Windows 8.
Important Note: If you will change the settings for Windows 8 then you must restart your computer.
13. After styling the start menu close the Control Panel of ViStart.
14. Done!


